
Starting in July, we are going to do SECRET QUILT PAL. If you would like to be part of this, please return your questionnaire to me at the July meeting or email it back to me. This is a way of getting to know another member. You will draw another member’s questionnaire at the July meeting. (Do not tell them you have their questionnaire. It’s a secret!) Each month, bring a card or a little something costing less than $3, and in their birthday month not over $5.00. (You don’t need to spend any money if you don’t want to. We all have plenty in our stash we can share.) We will have a table which will be used as a Post Office each month. At the July 2016 meeting, reveal who you are to your Secret Quilt Pal. Any questions, please email me. — Ann Ware
June 2015 Newsletter
May 2015 Newsletter
Star Quilters Guild Banner

Pieced by Loretta Twiford,
embroidered by Linda Greene, and quilted by Linda Whisman. Beautiful work, Ladies! Thank you!
Supply List for Starry-Eyed Quilters Meeting April 27, 2015
We will be playing around, making fabric beads.
(Sue, I will be bringing oil cloth table covers for your table)
Bring fabric scraps, enough to share would be fun.
The beads can be made in many different sizes, but we will start with using these size strips, in 3 different fabrics:
2″ x 6″, 1″ x 5″, 1/4″x 4″.
Fabric Scissors
Glue Stick
We will have some wire, beads, lace and other trimmings. Feel free to bring some, too! We’ll have dowels.
See you at Sue B’s at 7, Monday evening, April 27, 2015!
Photos in Fabric
Converting a photo to fabric takes fewer artist genes than you might think. My secret is using software to manipulate the photo into a “values” picture to use as a pattern. My package is Adobe’s Photoshop Elements 10 on Windows, but there are several alternatives, each with their own lingo:
- Picasa: free download from http://picasa.google.com/. “Crop” is in the 1st menu tab. “posterize” in the 4th menu tab (“more fun and useful photo editing”) does the values thing.
- Corel Paintshop Pro $30 on Amazon: contours, posterize, and topology. Demo available
- Tammie Bowser’s is $99 and up.
My directions below use the Photoshop Elements names for the various tools.
Supplies:
- Photo (to which you have rights) scanned into computer.
- Clear plastic to make a pattern (e.g. a clear photo sleeve protector or a shower curtain)
- Dark sharpie
- 7 or so fabrics; graded from light to dark.
- Steam-a-seam-2-lite
- Scissors for cutting paper
- Iron
- Applique Pressing Sheet (fusible won’t stick.)
 Steps:
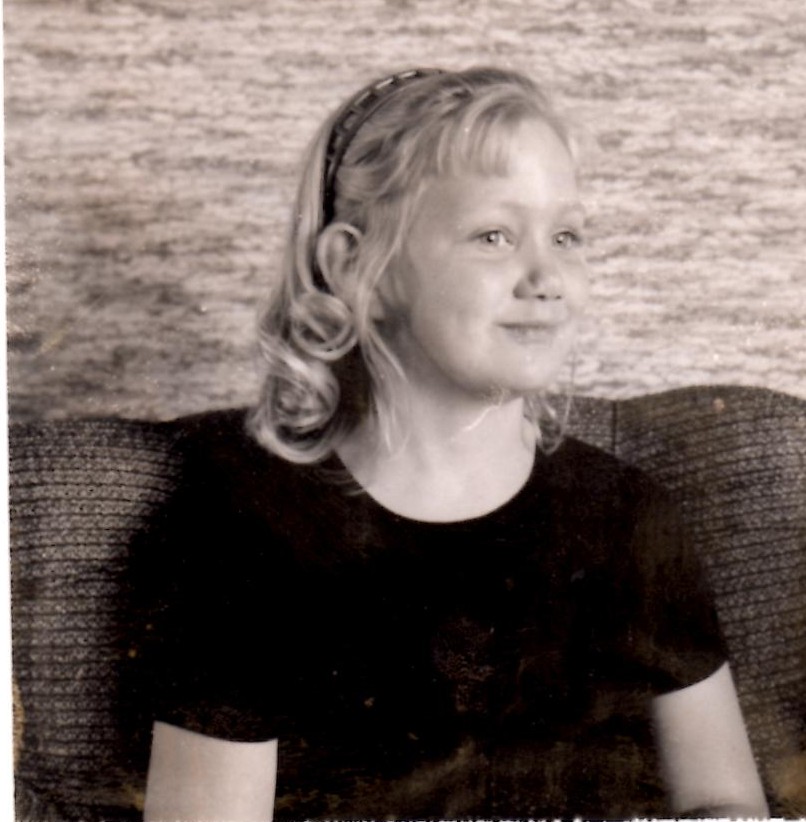
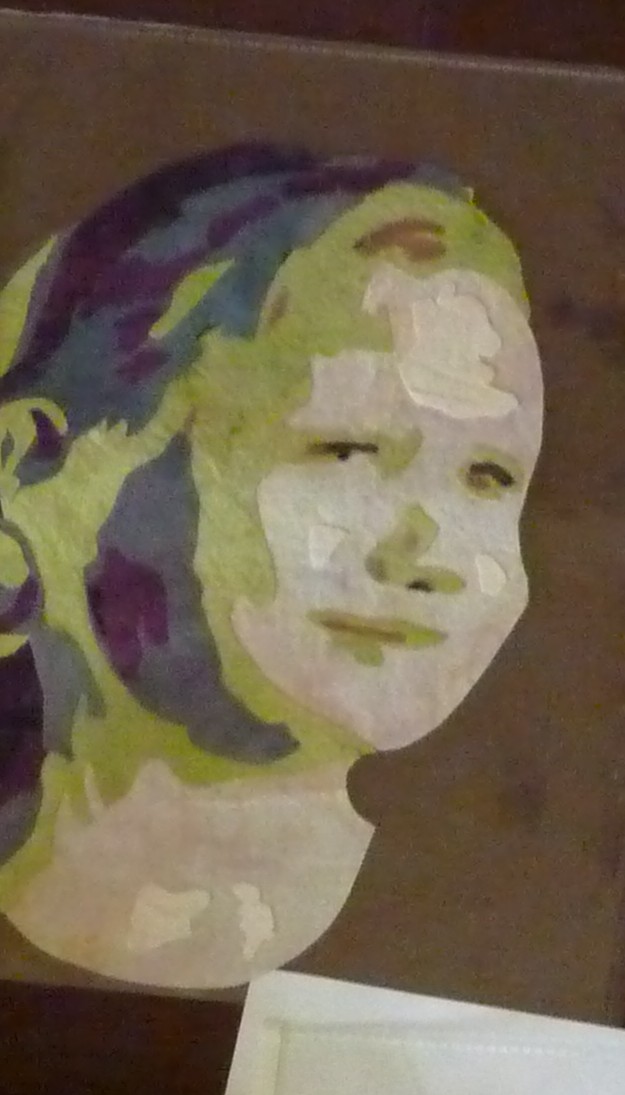
- Choose a photo with nice contrast. For faces; make sure there are some shadows to delineate the features. For example, I used this Polaroid taken by my father when I was little.
- Lighting from the side is always good; flash photos may not have enough shadows.
- Decide either the original colors from the photo or values of any colors
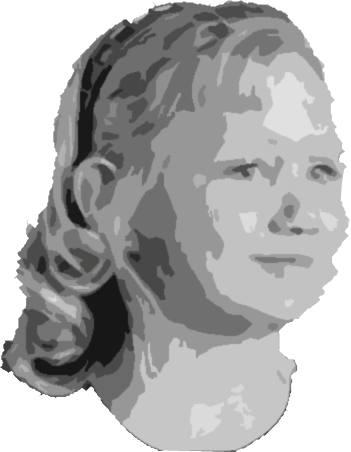
- If you are not using the colors from the original, then change it to black and white:
Enhance… Convert to black and white - Now, convert it to a “values” picture. In Photoshop Elements: Filter… Artistic… cutouts. Try different number of levels from 4 to 7. The best choice depends on the picture.
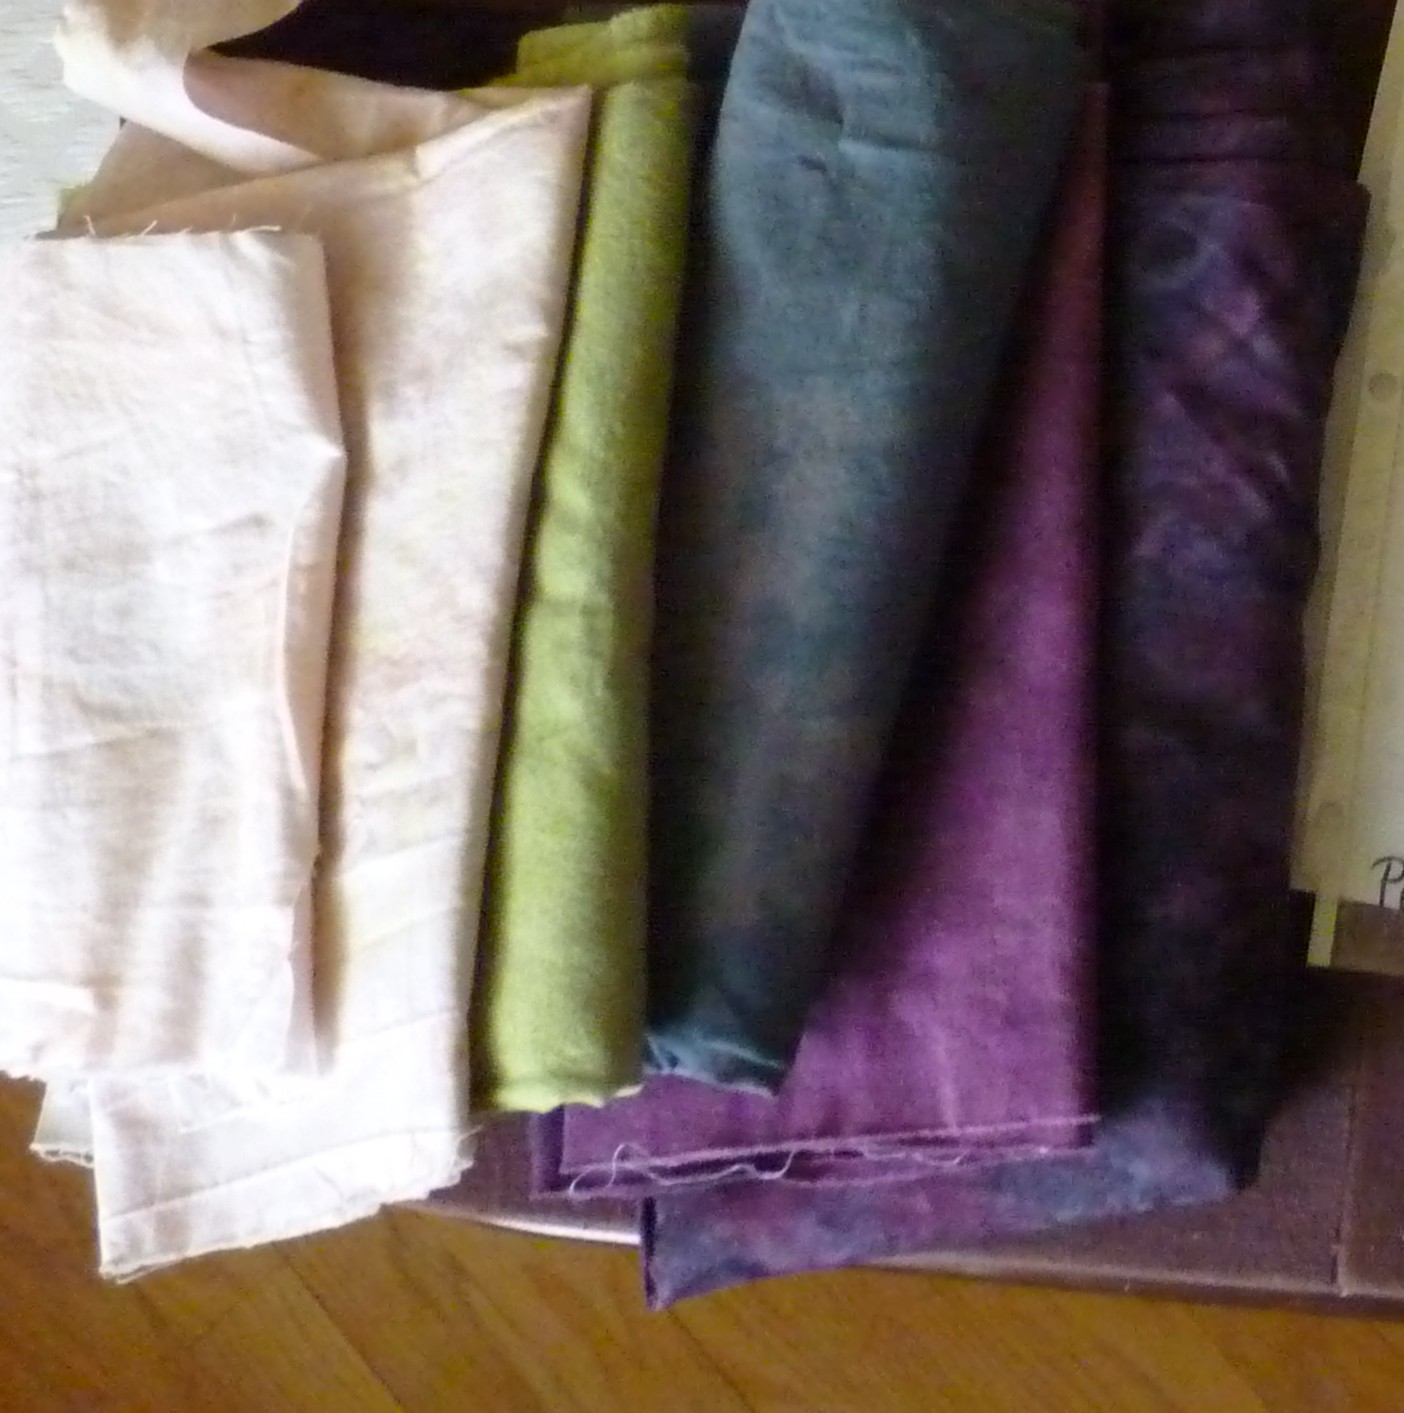
- Choose fabrics
- Original colors: about 4 value levels in any given color family; like face vs. clothes & hair.
- Free colors: use the black & white tweaked photo with 5-7 value levels in any colors you like. Previously, I always used realistic colors, but this time I experimented.
- Avoid contrast in any one fabric; want constant value.
- Cut fabric
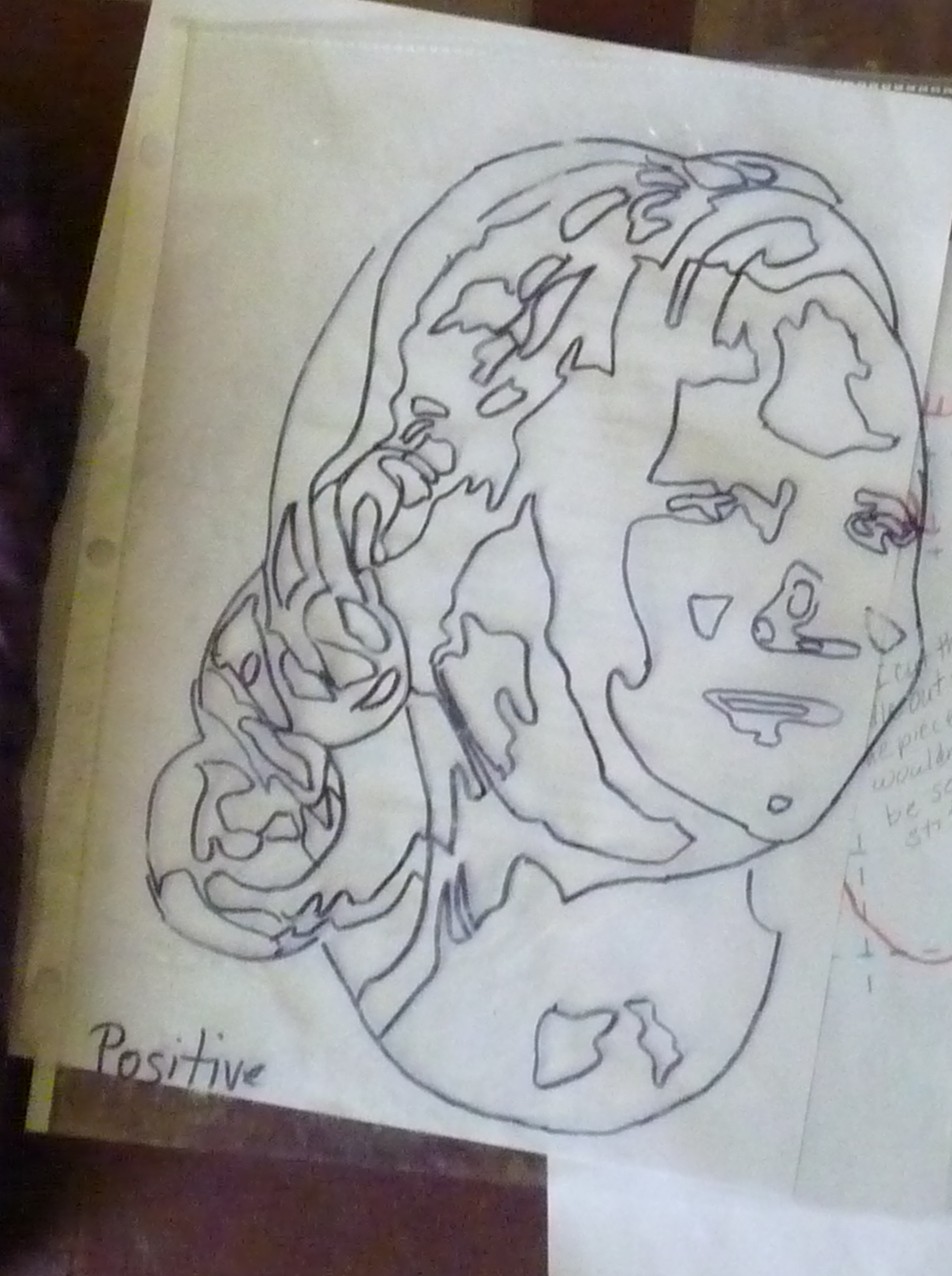
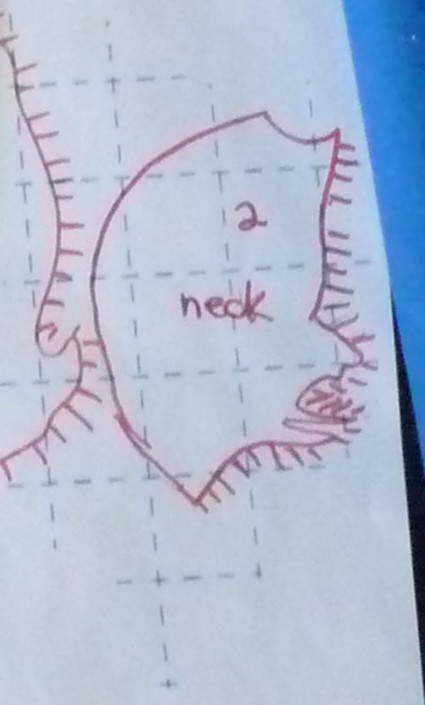
- Make a “placement diagram” by tracing face edges onto plastic with a sharpie and write POSITIVE on it
- With placement plastic upside down, trace individual shapes onto grid side of fusible leaving some space for overlapping.. leave at least 1 edge “extra” to tuck under another shape. (I draw “hair” sticking out where I don’t want to cut tight) Cut out loosely.
- For tiny dark bits, don’t make patterns. Add those details later with markers, paint, or pens.
- Fuse all the shapes for each fabric level onto BACK of fabric. Cut on shape line; except for the “tuck under” edges


- Build the photo
- Use an applique pressing cloth for a base
- Arrange the pieces under your plastic placement diagram nudging into place.
- Set aside the plastic diagram (it’ll melt), cover w/ your pressing cloth & fuse together.
- Finish
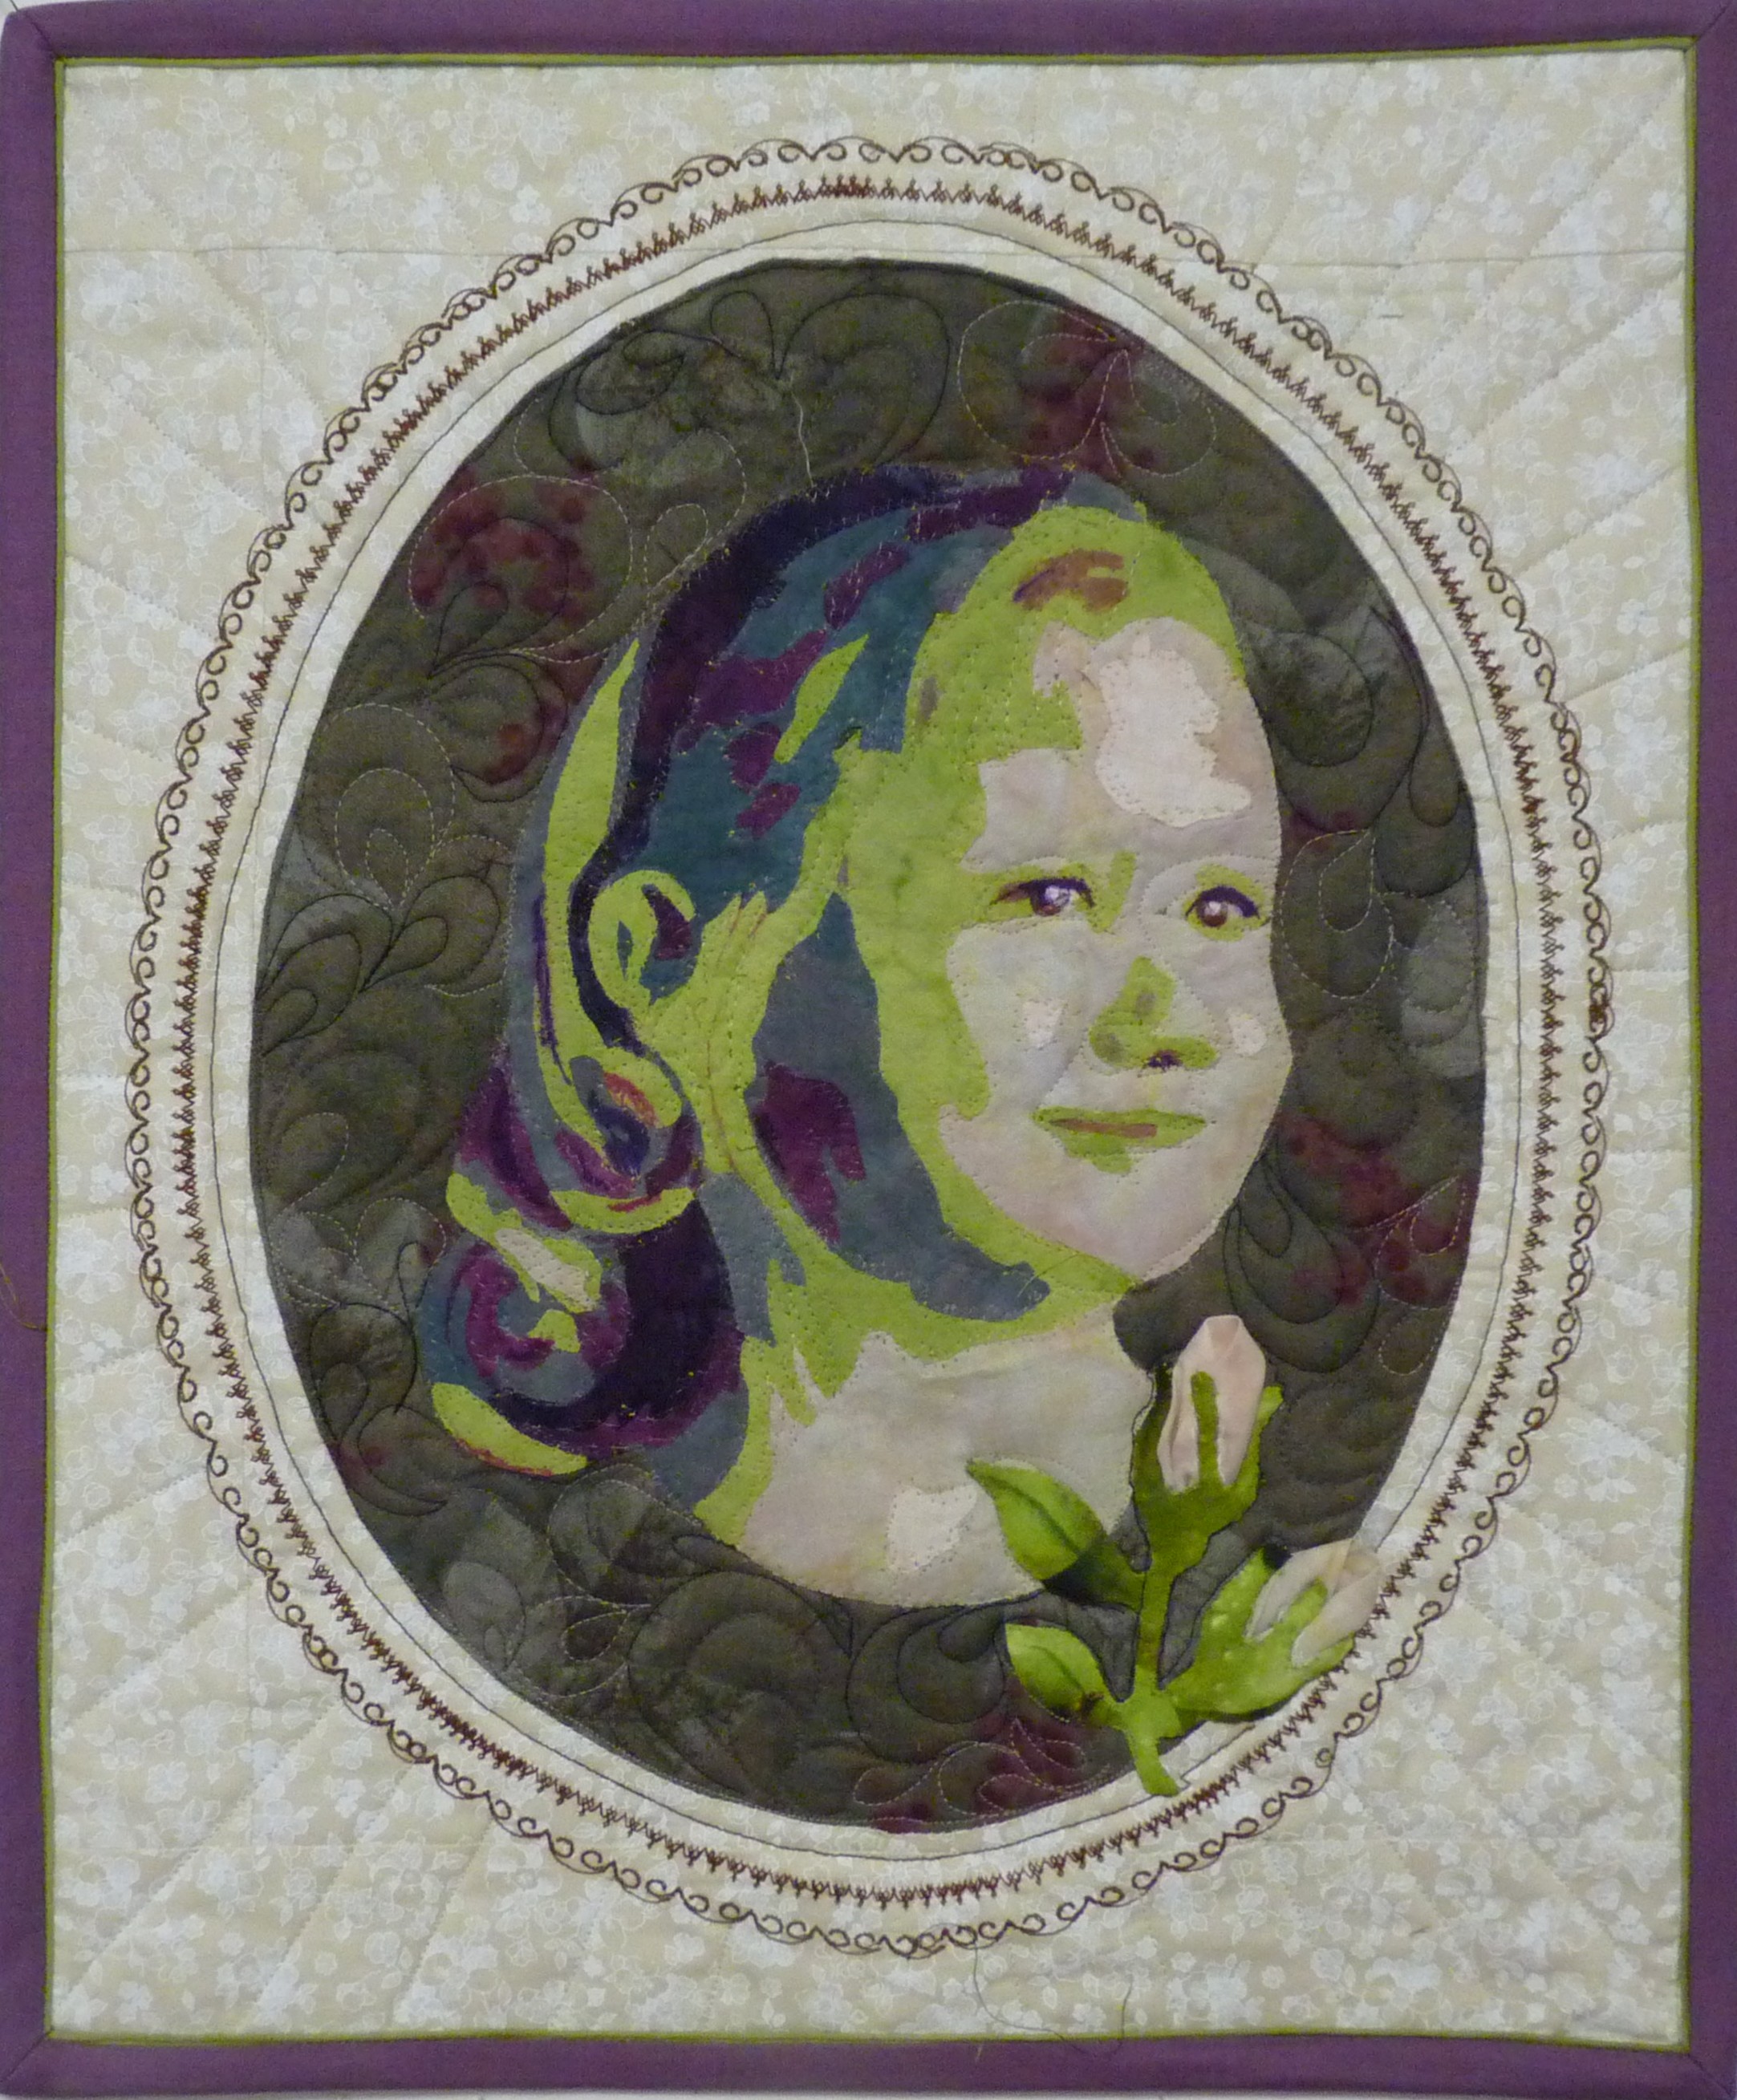
- Fuse your motif onto the quilt.
- Anchor all pieces with stitch of choice. I used a free motion zigzag with invisible thread. Other choices: the “snow” stitch (#105 on a Bernina), just free motion around like Tammie Bowser.
- Quilting: either quilt A LOT or not at all. Don’t mimic the color edges; those are not muscle edges and look funny. Actual edges like a nose or ear profile work.
- Invisible thread works, but hair likes colored thread work.
— Susan Kraterfield
April 2015 Newsletter
Coming in May: Floyd Guild hosts Art Quilt events
Lecture: “Photos and Quilts”
Ann Shaw discusses adapting photographs for pieced quilts, her approach to taking pictures to make into quilts, and the design choices affecting the look of her quilts. She is happy to take questions from the audience. Ann Shaw teaches internationally and has been personally endorsed by Ruth McDowell to teach her style of quilting. Visit Ann Shaw’s site for more information on this talented artist.
Monday, May 4th, 2015 10 am
Jacksonville Center for the Arts
Guest admission $5
Free for members of The Quilting Party, River City Quilt Guild and Floyd Quilt Guild
Workshop: Flowers of the Gorge


Tuesday, May 5th, 2015 at 9:30am
Jacksonville Center for the Arts
220 Parkway Ln. S, Floyd, VA 24091
Ann Shaw 1-day design and piecing class based on the design and piecing techniques of Ruth McDowell.
Flowers have been an enduring source of inspiration for quilters with many traditional quilt blocks featuring flower patterns. Miniature wild flowers found in the Columbia River Gorge have inspired these patterns. Ann Shaw’s designs will come alive with unexpected fabric choices. This workshop is suited to all levels including the confident beginner.
You will select one of several flower patterns, prepare a freezer paper template and then begin the process of selecting fabrics for your design. We will also discuss sewing methods and sewing order to complete your wall hanging.
Registration for members opens December 1st, 2014, for non-members February 15th 2015. $65 workshop fee per person for non-members
$55 for members of Floyd Quilt Guild.The Quilting Party, and River City Quilt Guild.
Pattern required (see supply list: approximately $8 – $18.00) More patterns to come!
For more information, please visit http://www.floydquiltguild.com/workshops.html to find registration forms and supply lists.
