
I made this slide show during COVID when I didn’t feel comfortable hosting a Starry Eyes “in-person” play date; to help the newbies get started with dying.
Category: FAQ

T-Shirt Quilts; A Labor of Love
This is the presentation from Dawn Schaben’s February 2019 program on T-shirt quilts.
How many t-shirts do I need to make a t-shirt quilt?
- 12 t-shirts: throw approximately 48 x 64
- 20 t-shirts: twin size quilt approximately 64 x 82
- 30 t-shirts: full size quilt approximately 82 x 96
- 36 t-shirts: queen size quilt approximately 96 x 96
- 42 t-shirts: king size quilt approximately 110 x 96
These measurements include 1.5 inch sashing and 2 inch border with each t-shirt block being about 14.5 inches.
5 Typical styles of T-shirt Quilts
- Traditional Block Style with Sashing
- Traditional Block Style without Sashing
- Unequal Rows or Columns
- The Too Cool Style also known as: Variable or Puzzle Styles
- Crazy Quilt Style
Details to look for in a T-Shirt Quilt
- Using interfacing or not
- Blocks Fit the Designs on the T-shirts
- Designs Are Centered on the Block
- No Part of the Design on the T-Shirt is Cut Off
- The Blocks are all different sizes
- No Rows and Columns
Ways to Mess Up Your Quilt
- Using cheap fabric and materials to make your quilt.
- Using 100% polyester batting
- All the blocks are the same color
- No thought put into layout
Layout Design Ideas
- Shadow Box
- Patchwork
- Leave On collars, pockets, patches
- Incorporate Photos – graduation quilts
- Turn the Blocks on Point – more challenging
- Use Quilt Patterns Designed for Large Blocks
What do I need to make a t-shirt quilt?
- T-shirts
- Interfacing
- Material for sashing or blocks (pre-washed)
- Material for backing (pre-washed)
- Batting
- Polyester – pros and cons
- Cotton – pros and cons
Sorting the T-Shirts
- Sort by color
- Do you have enough for more than 1 quilt
- Remove stained shirts
- Remove shirts with holes
- Do you have a theme?
- Sport
- Activity
- Organization
Preparing your t-shirts
- Wash and dry – do not use softener – interfacing will not stick to the t-shirt
- Cut up the t-shirt
- Front, back, sleeves
- Cut the pieces larger than you want for the actual blocks
- Make sure you cut off neck edges and seams (don’t want that extra bulk in seams)
- Fusible interfacing
- After you have applied the fusible interfacing, trim the shirt down to the desired size – do not cut off any of the design and remember to leave seam allowance
Interfacing /Stabilizer
- Knit or woven
- Pellon SF101 Shape-Flex – Iron-on Woven (great if you are using t-shirts with lots of wear)
- Bosal 312 – light-weight not woven
- Pellon Quilters Grid 820 – non-woven
- Attached Mistyfuse
- Pellon 906F Fusible
- June Tailor T-Shirt Interfacing
- White or Black based on color of t-shirt
- Follow the manufacturers instructions for the fusing!! IMPORTANT!!
- Weight of stabilizer – don’t use a heavy stabilizer as it will add weight and take away the drape and the comfort feel of the quilt.
- Don’t piece interfacing – it will show through in the finished quilt
- Benefits of stablizer – blocks that are easier to work with and give you a better finished product, especially during the quilting process.
Design Ideas
- Sashing or No Sashing
- I personally recommend sashing as it gives the quilt stability and helps with the stretch issues that can occur when you sew t-shirt to t-shirt.
- Sashing can also provide an overall look that pulls together all the different colors in the t-shirts.
- Don’t have to use traditional blocks with sashing. Try something different.
- Who says that all the blocks have to be squares and rectangles? Take this T-shirt quilt idea for a spin, by piecing striped, checkered and zig-zag sashing to make your shirt blocks really pop!
November 2018 Star Quilters Guild Newsletter
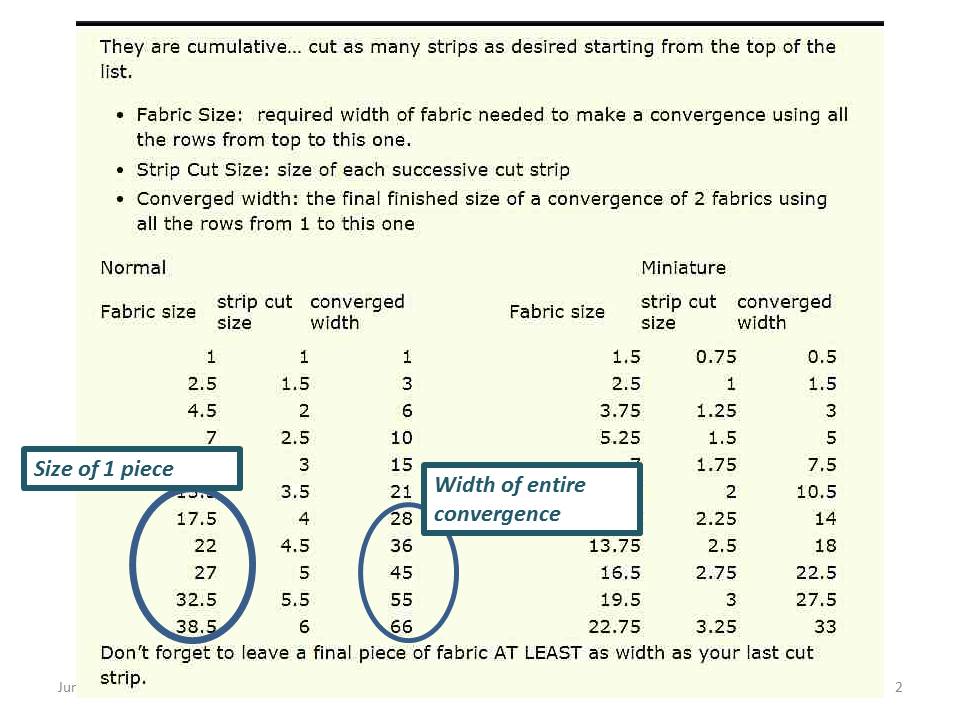
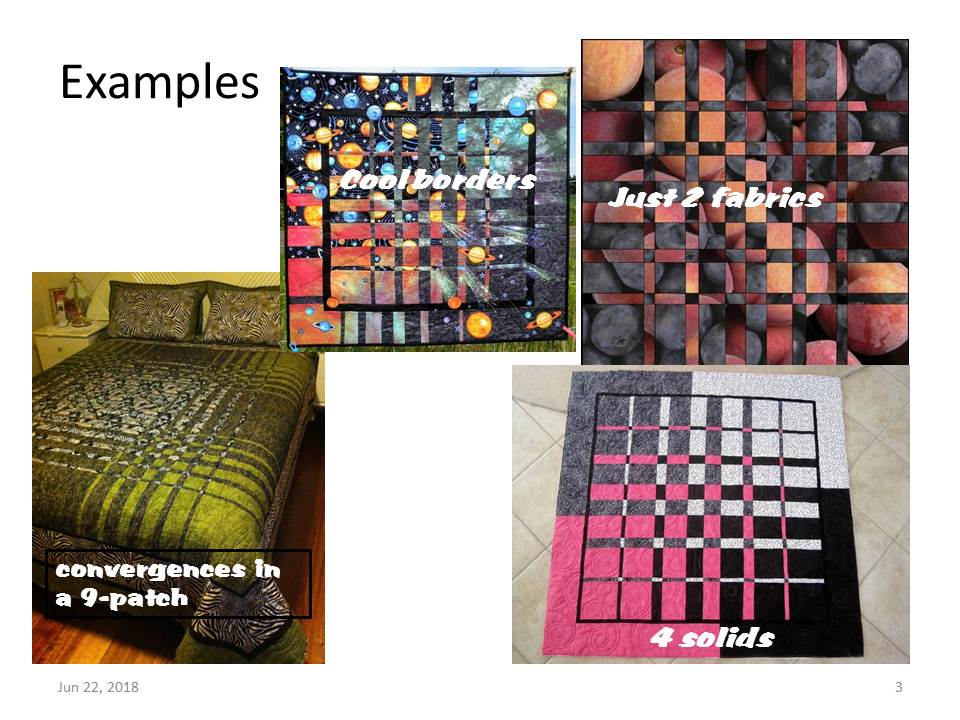
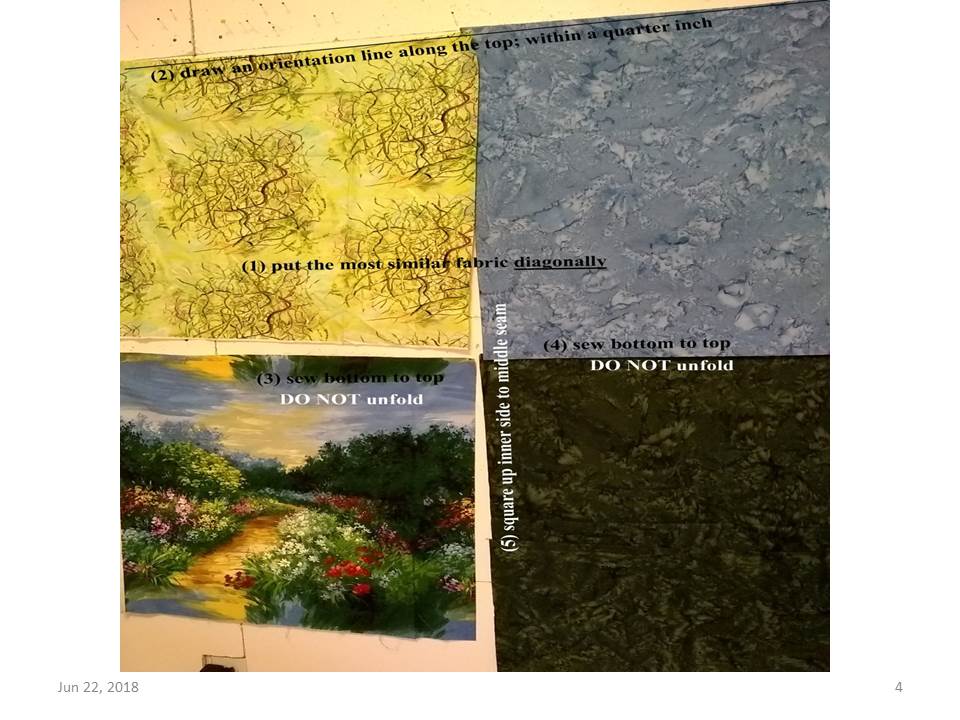
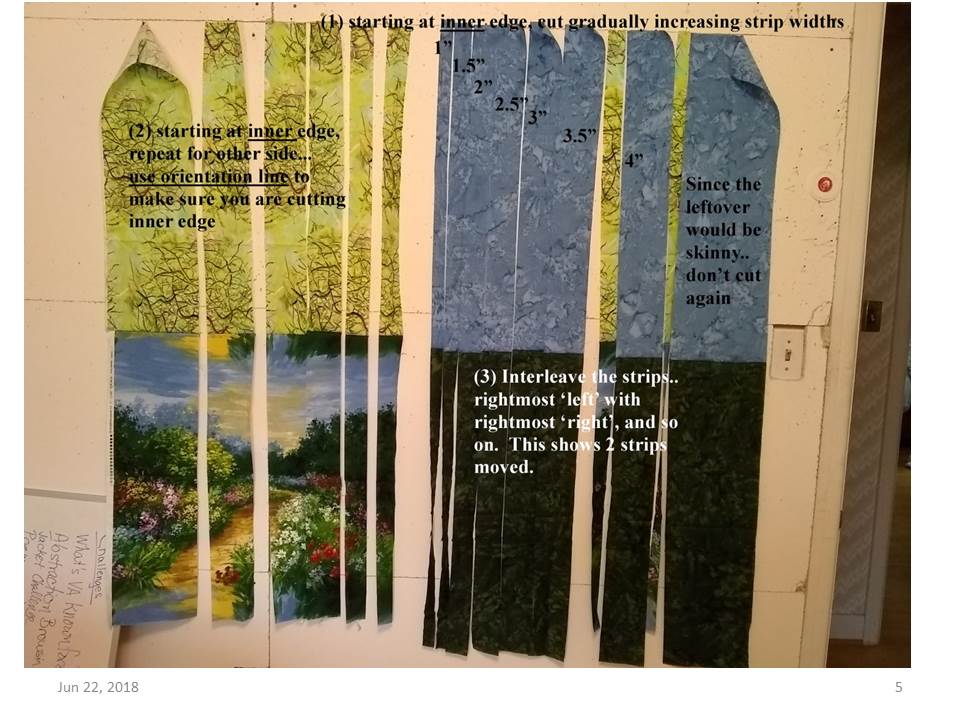
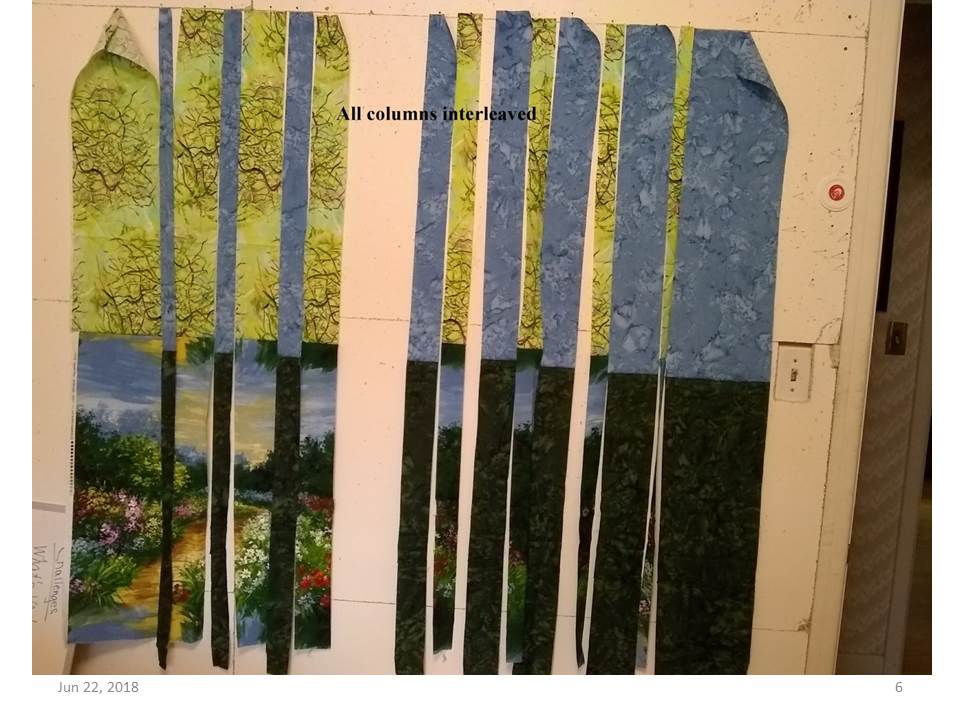
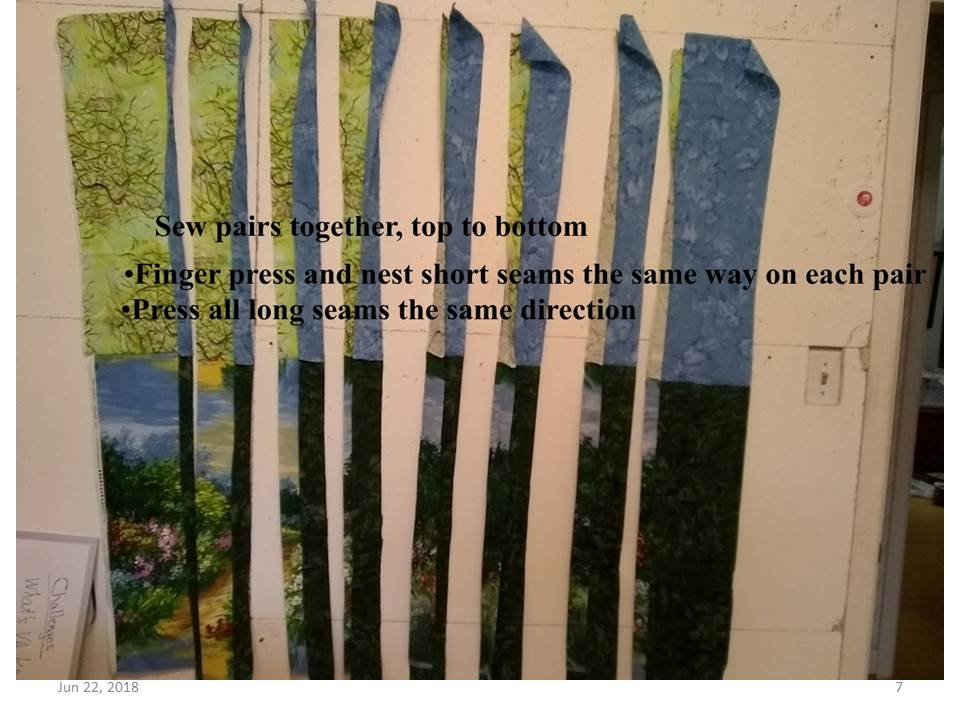
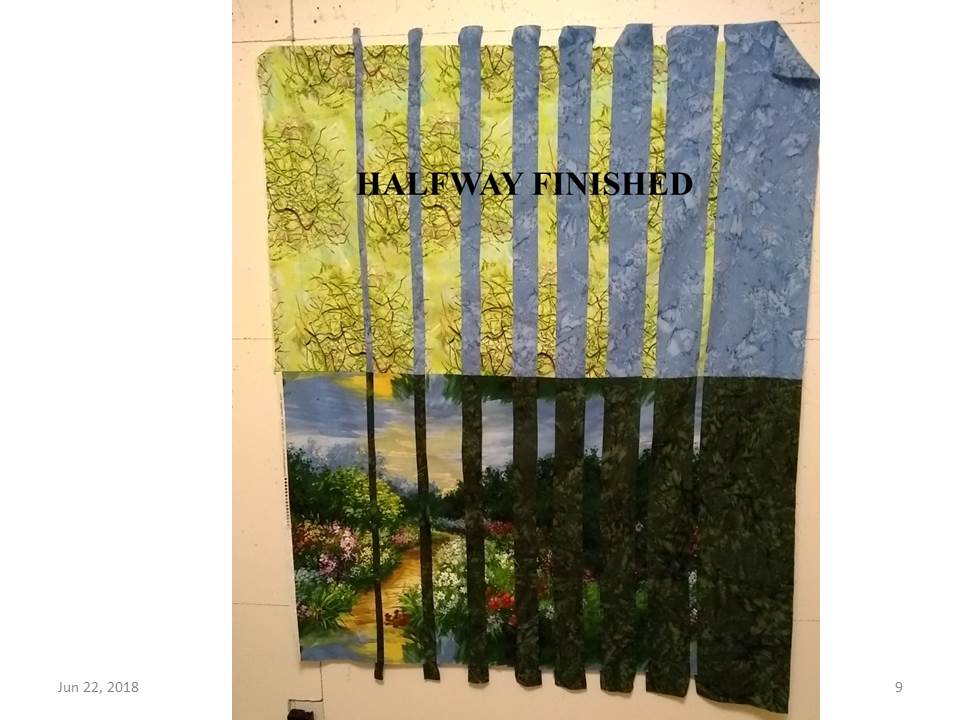
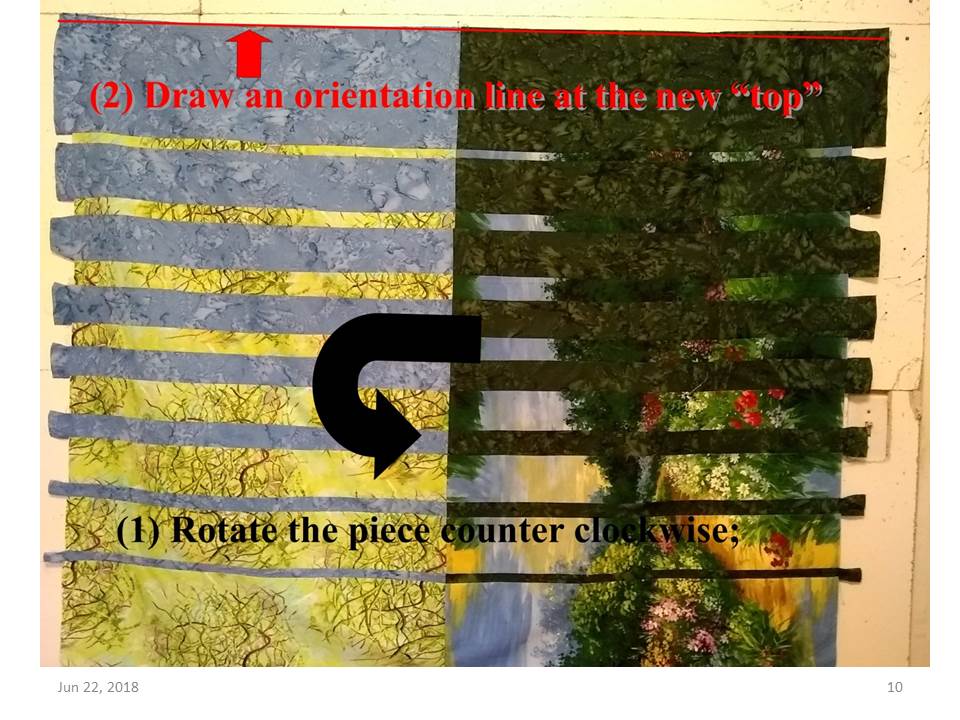
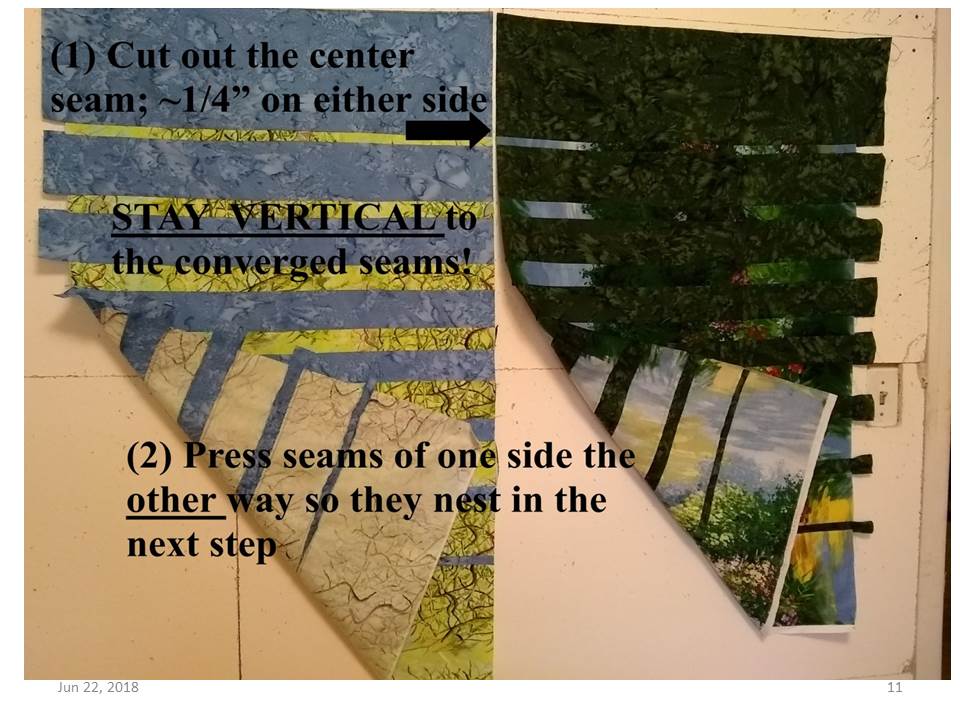
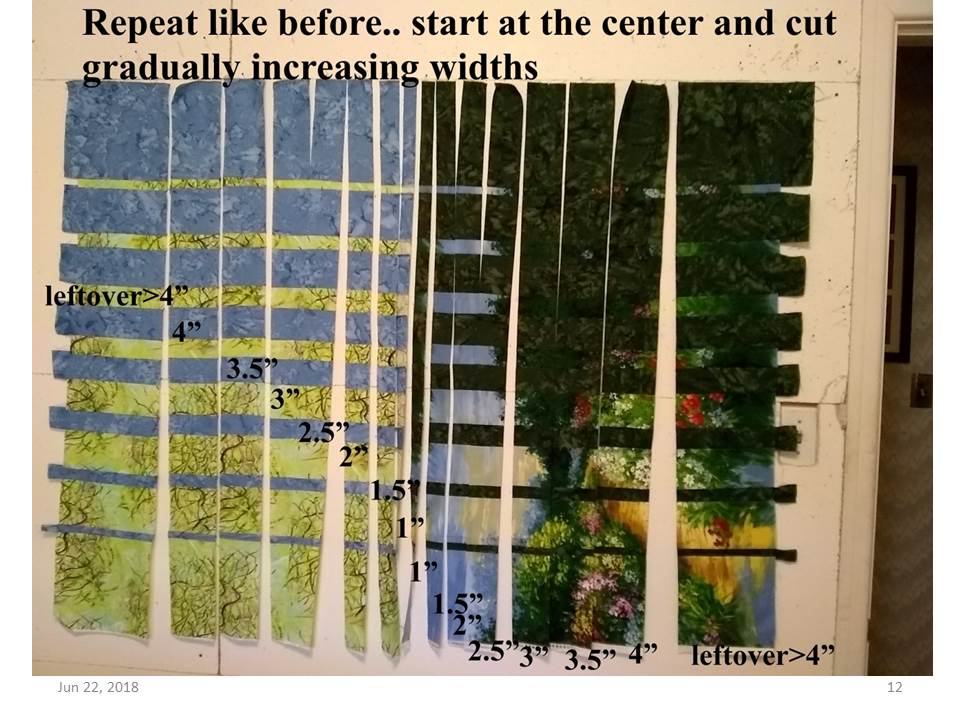
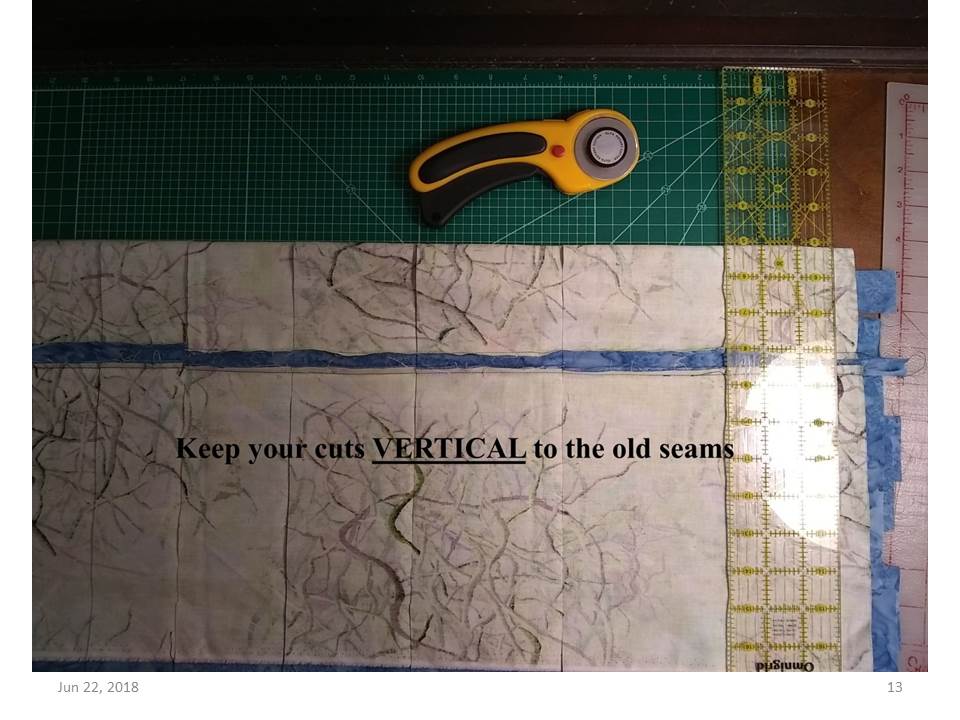
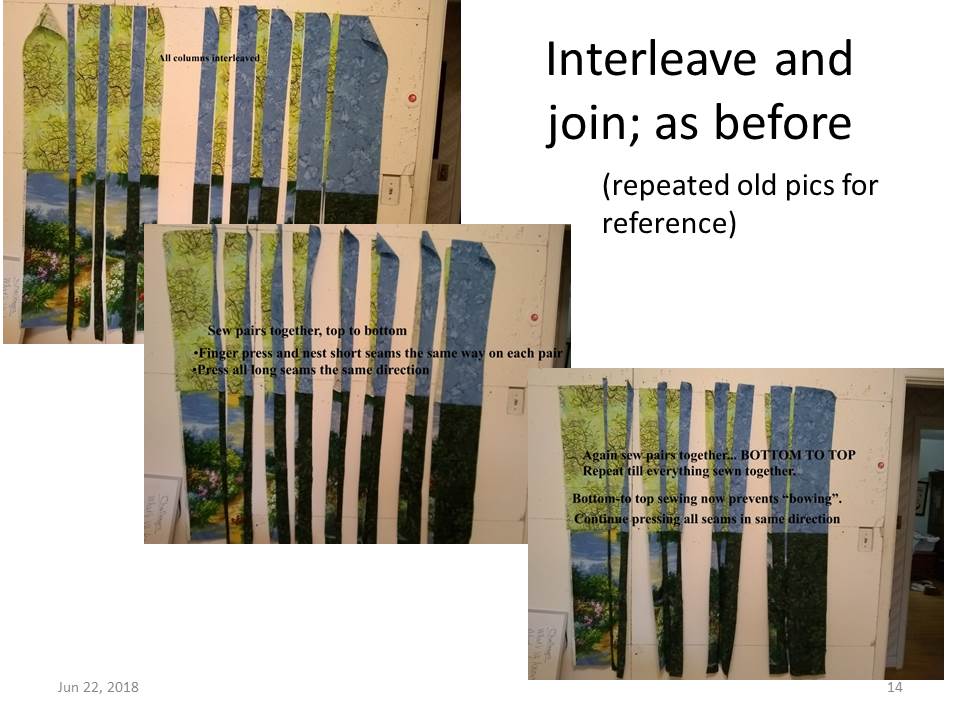
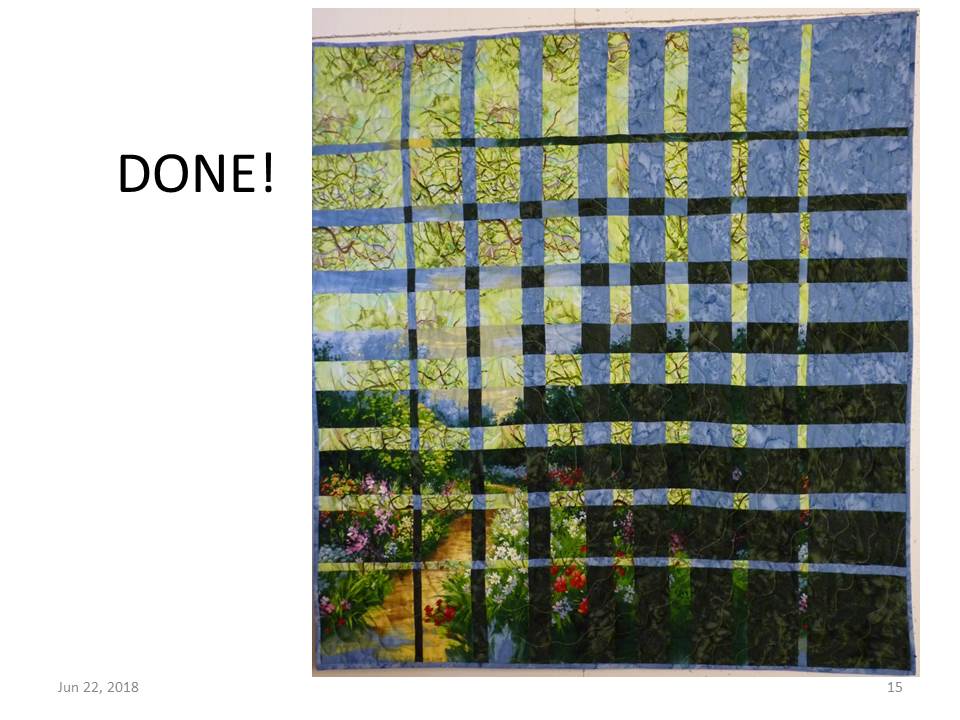
Convergence Quilt Workshop– Slideshow
Here are the handouts for a class held in June 2018 on making a convergence quilt.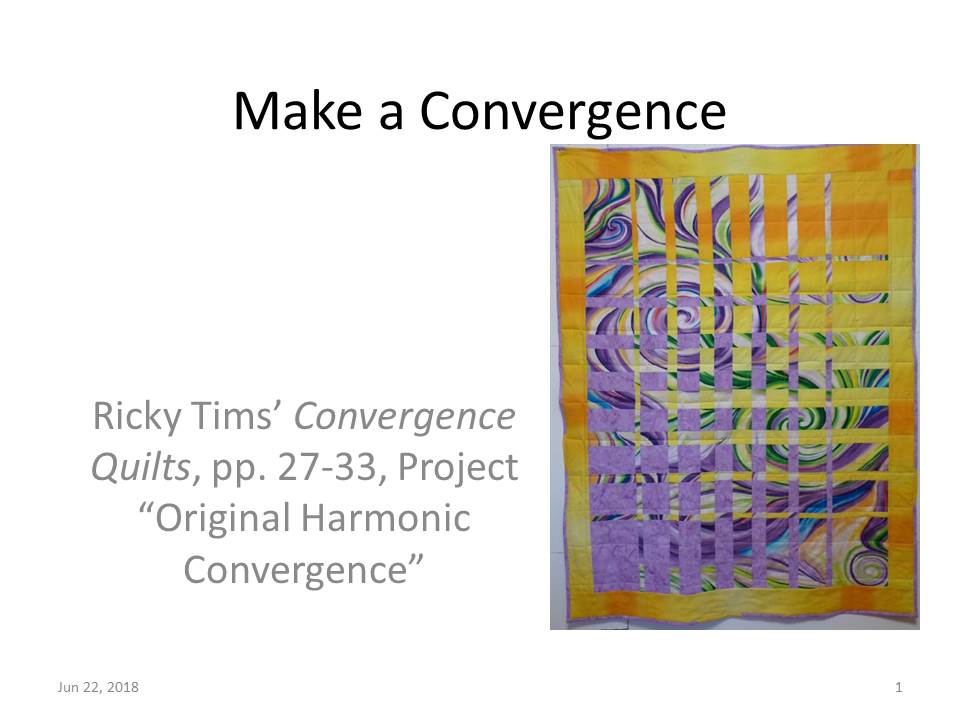

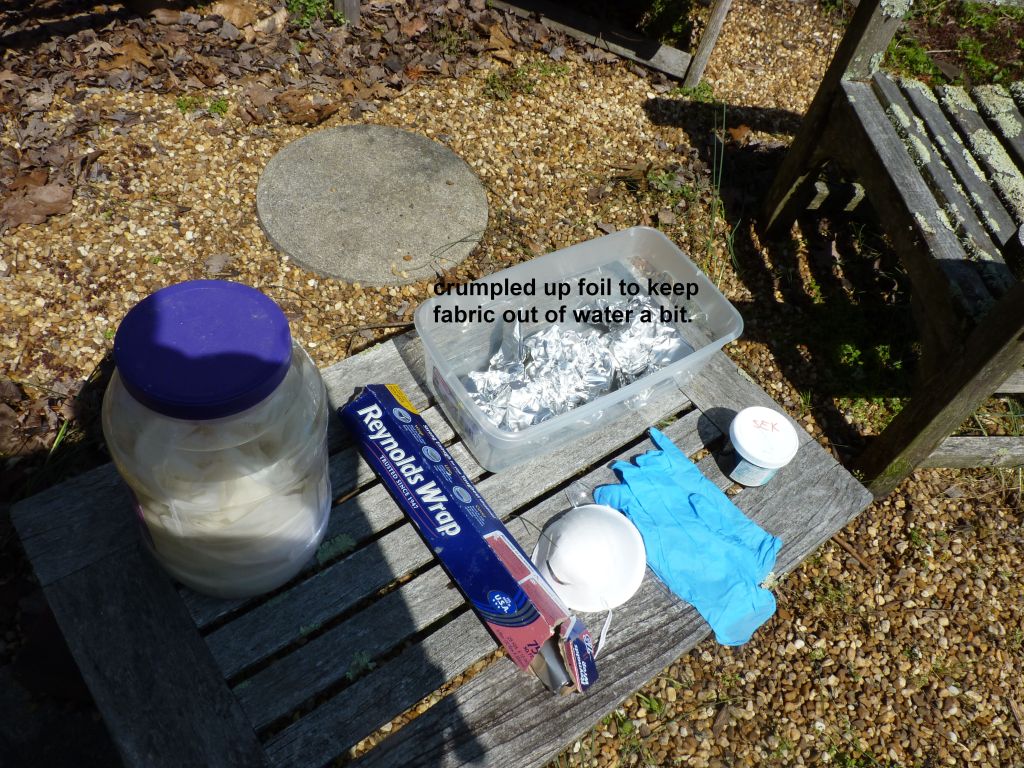
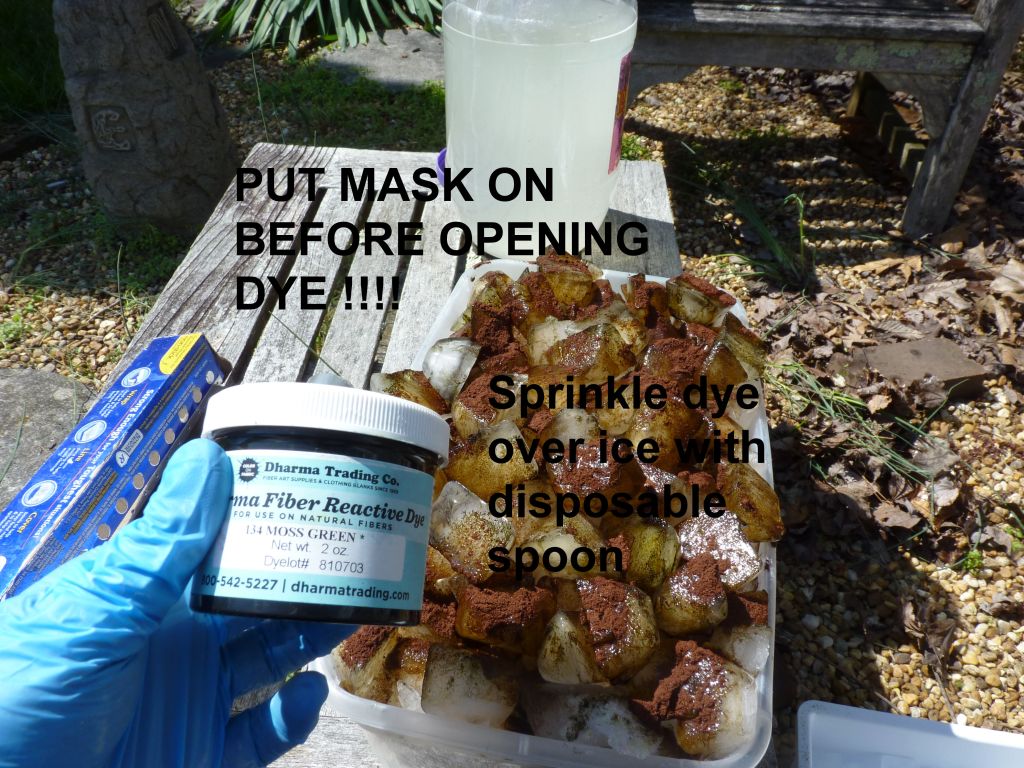
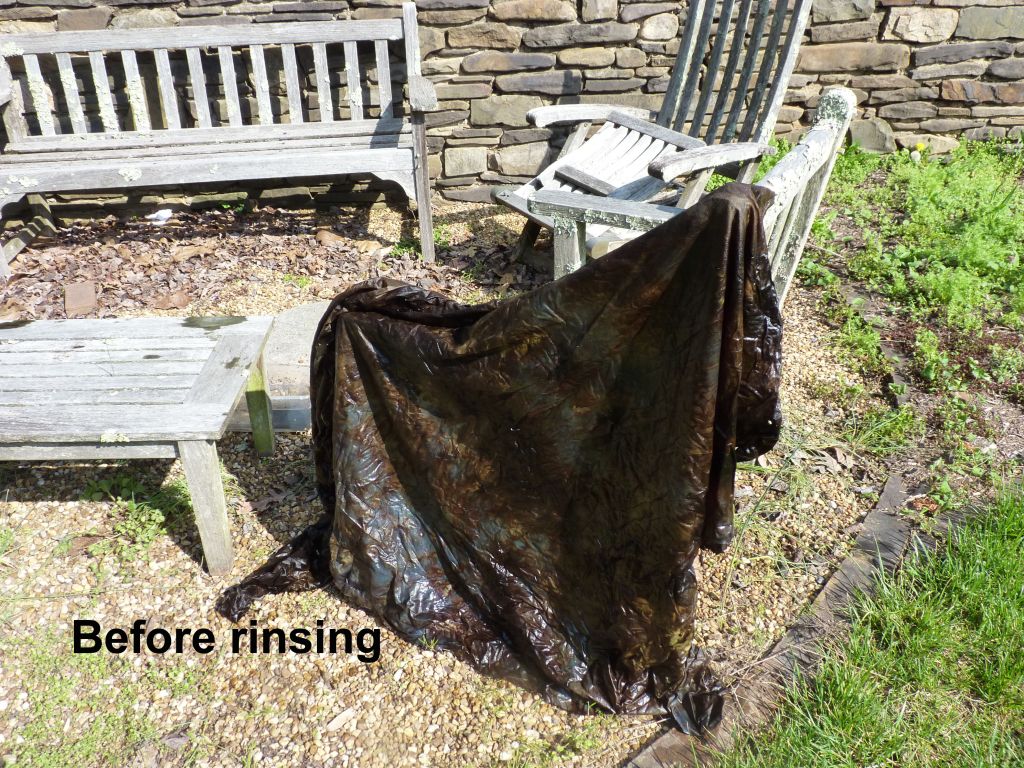
4Jun18 program: Ice Dyeing Reference Info
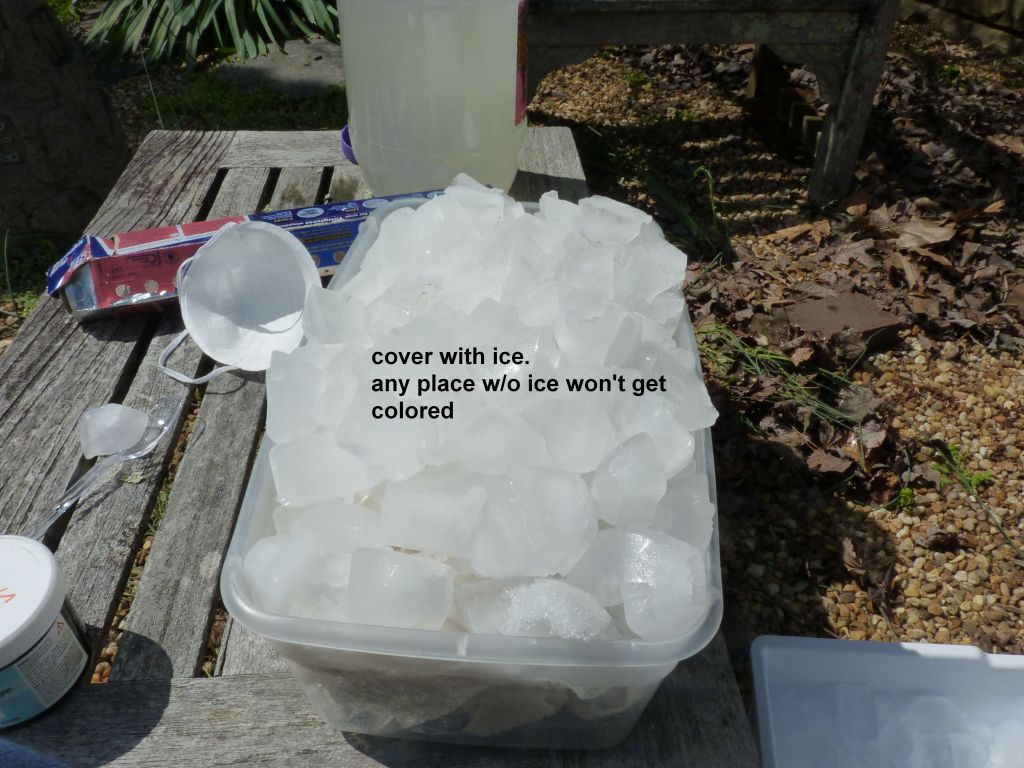
Ice Dyeing is super easy. Betty Tyree taught the Starry Eyes a couple years ago. I’ve done it 3 times since her workshop. So, although I’m not an expert I can assure you it’s easy.
I get all my information and supplies online from Dharma.
Dharma has 2 Tutorials online:
Learn How to Ice Dye
Ice Dyeing with Ugly Colors
The tutorials have complete supply lists and instructions.
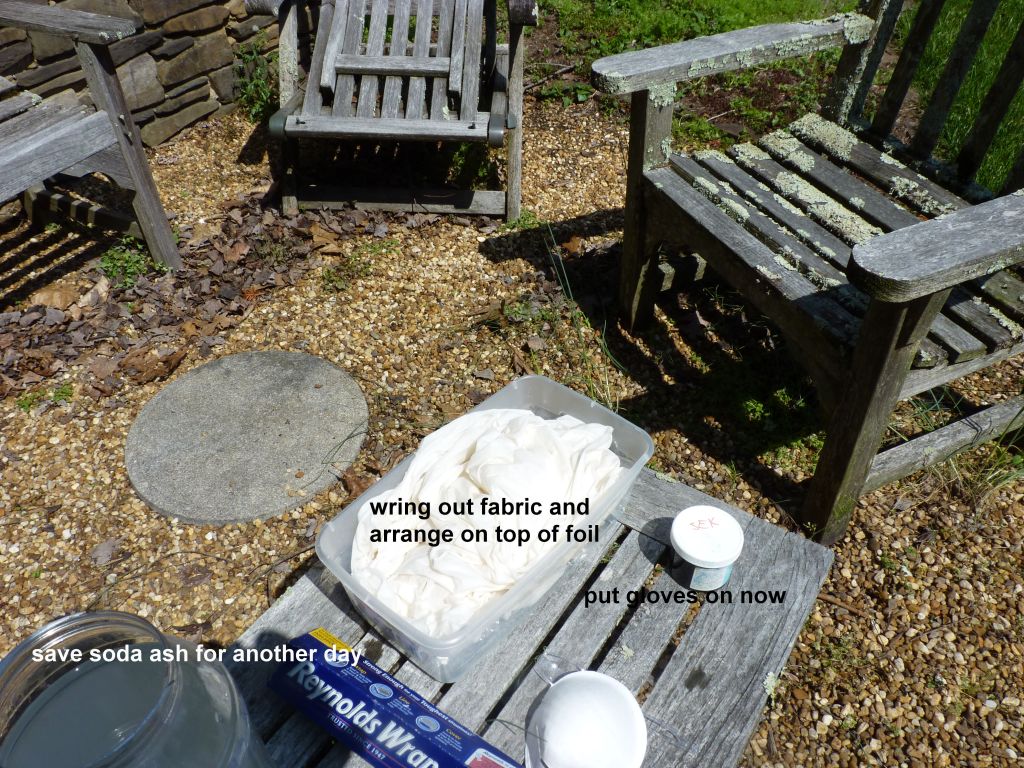
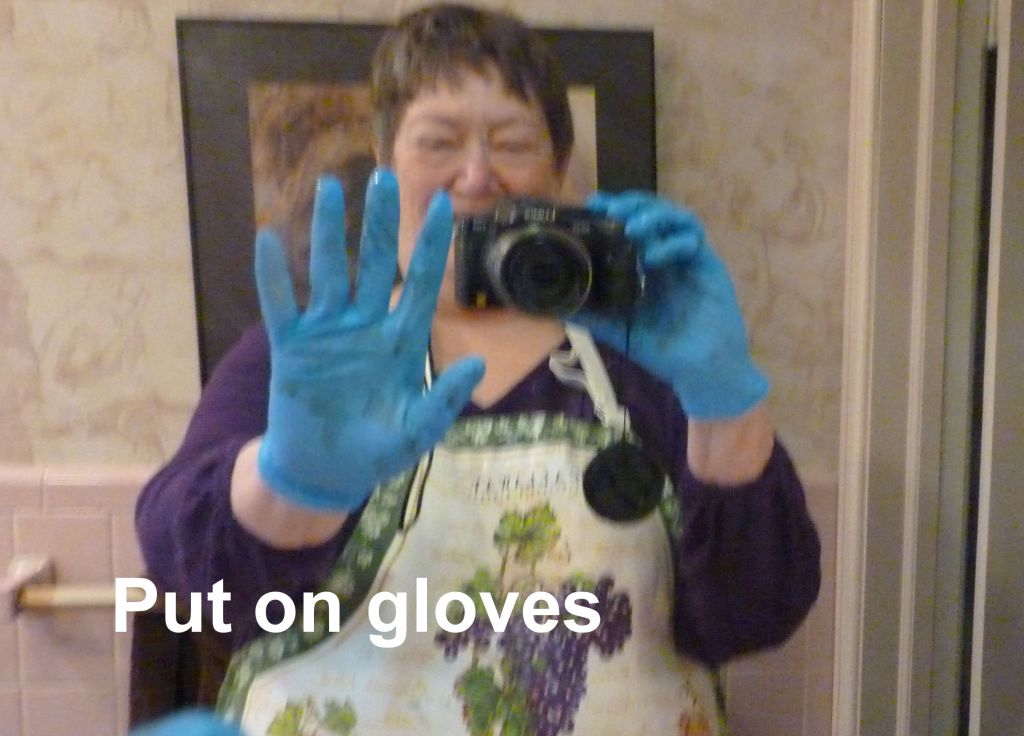
For fabric prep, I either use PFD (prepared for dyeing) cotton yardage or dyables as is, or I wash plain cotton in Blue Dawn dish detergent as Betty taught me. I don’t bother with the special textile detergent recommended by Dharma. I also use multiple soaks in Blue Dawn post-dyeing to get the excess dye out.
The only exotic items are the Fiber Reactive dye powder and soda ash powder. Dharma sells dye in primary color sets, or you can buy any specific color(s) you like. I bought my Soda Ash from Dharma, but apparently this commonplace chemical is cheaper bought locally. Kitty bought for our recent play date at a pool supply company. Kristen buys it as “washing soda”.
Two caveats:
- This process works best on plant fibers like cotton; the soda ash is for breaking down the cellulose in the fiber. It can degrade animal fibers like silk or wool.
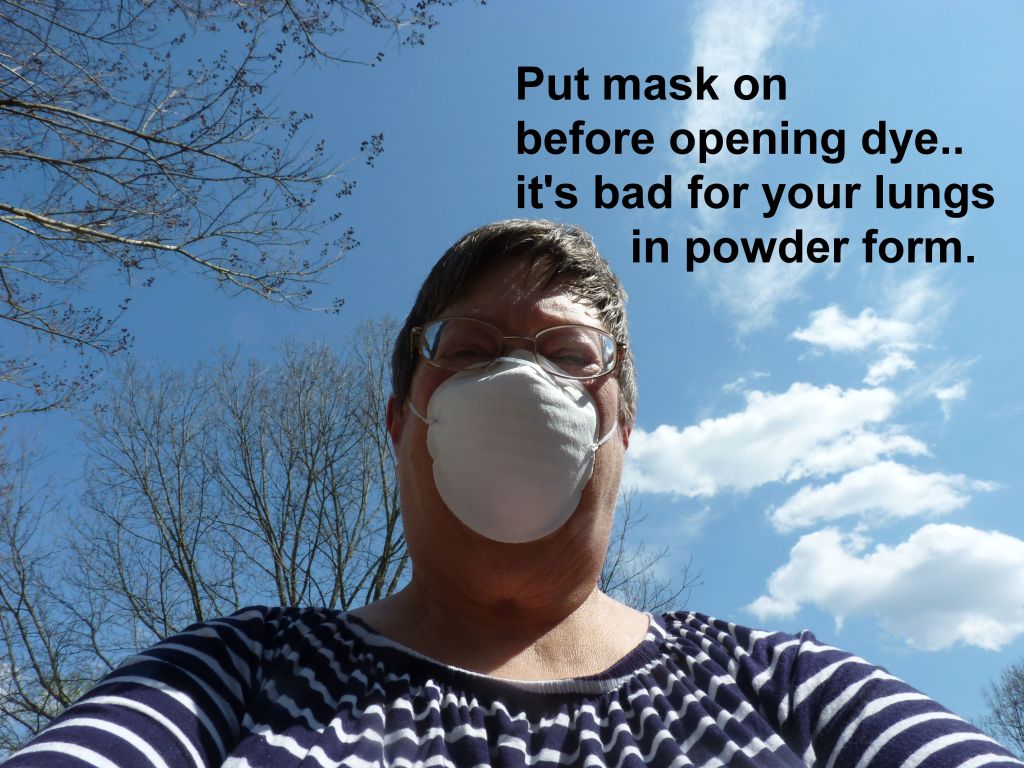
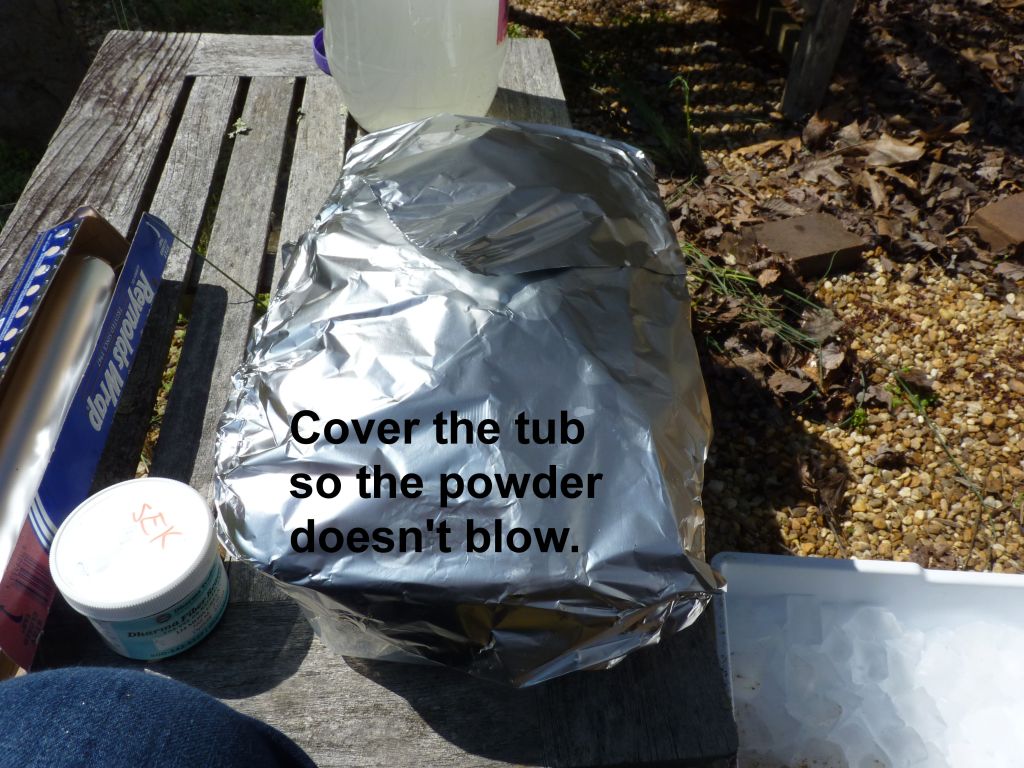
- WEAR YOUR DUST MASK from the time when you open your dye powder till when you cover your container of ice+dye.
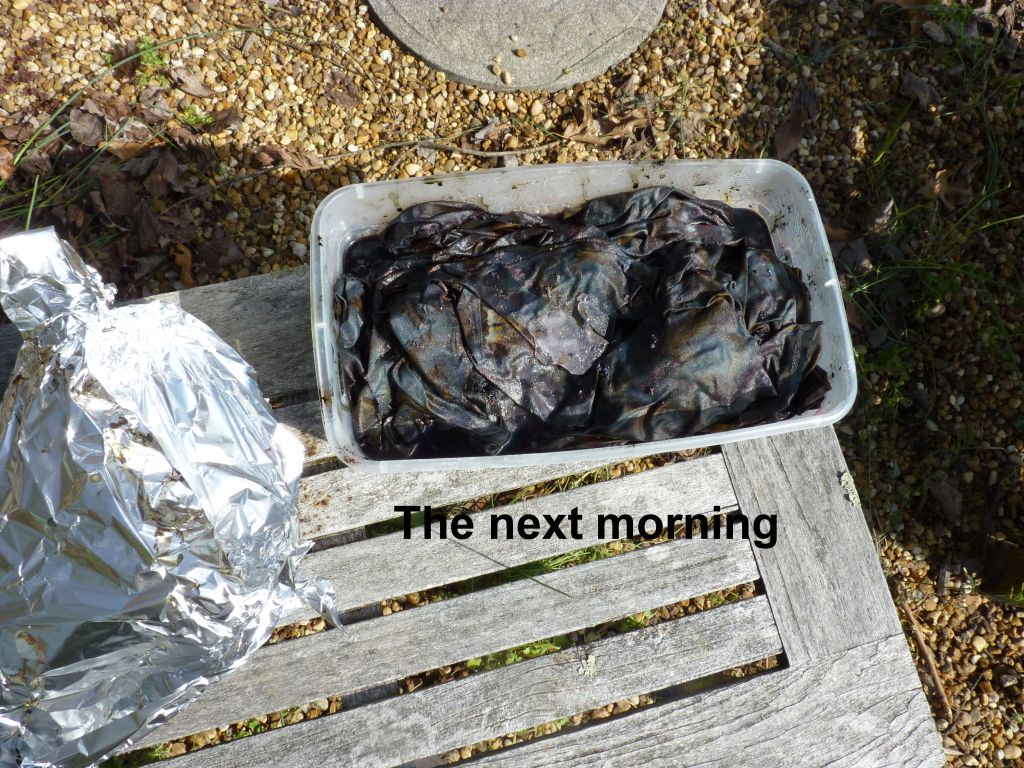
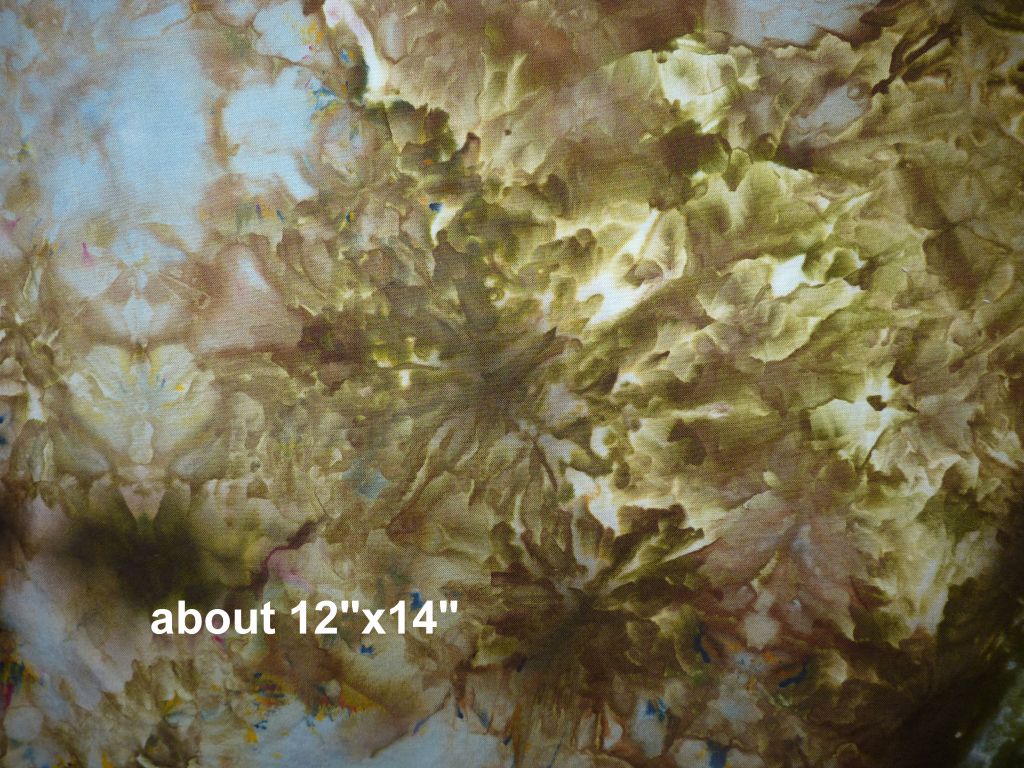
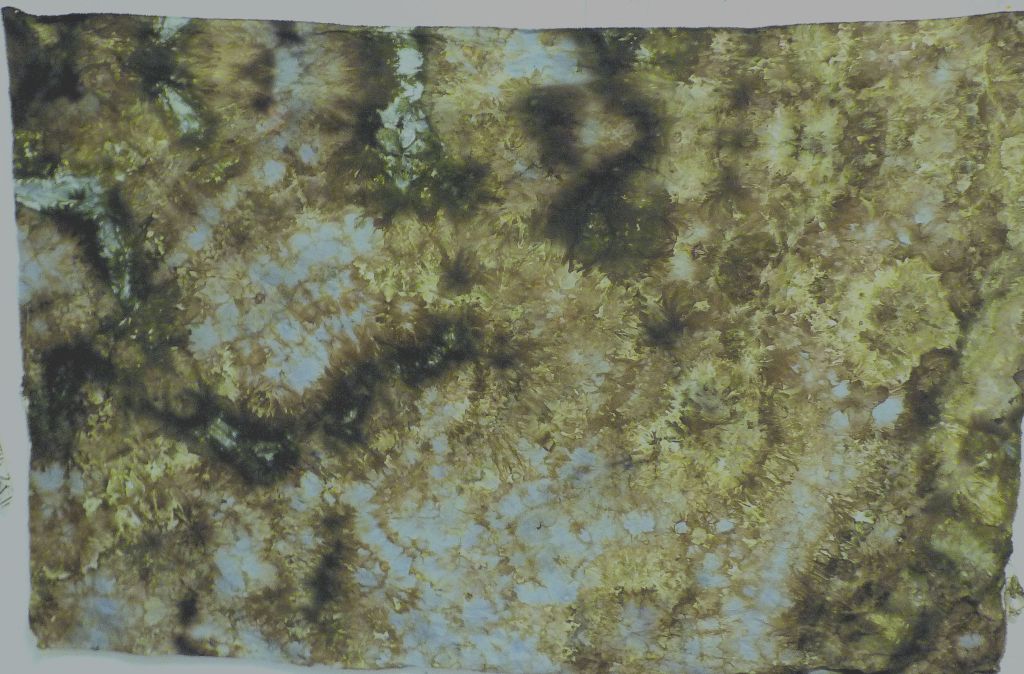
Below are shots of my most recent results.
— Susan K


rayon ribbon

folded


Searching for particular fabrics online
Kristen Farwig sends 3 recommendations she found on the great but now defunct site QuiltUniversity.com:
MISSING FABRICS http://www.missingfabrics.com/
Joyce Noell recommends searching for fabrics here —
Kim Clark says, “I have found some older material by typing in the name of the design found on the selvage edge if still on the fabric, and the name of the designer in the search box of the internet.”
Kathy Martin recommends Fabric.com
“They have just about everything and the site is easy to use.”
The quilter who asked this question mentioned polka-dot fabric. I put this in a google search engine —
quilt fabric white dots on navy
— and got images of fabric on sale for $2.25 up.
Easy Braid Quilt Border
TOOL:
Small Half Hexagon Template for 5” Charm Packs and 2 ½” Jelly Rolls
By Natalie Dawn for Missouri Quilt Company (SKU NOT132) – $5.95 online
INSTRUCTION VIDEO: Missouri Quilt Co.
INSTRUCTION STEPS:
- If not using charm packs or jelly rolls, cut 2 ½” strips of fabric.
- Cut out a stack of trapezoids using the template.
- Arrange and sew together to form braid. I construct two rows at once allowing chain stitching.


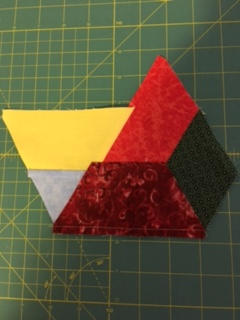
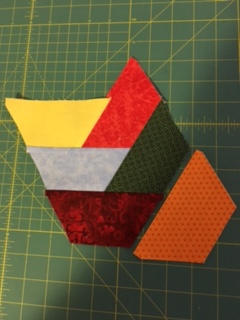
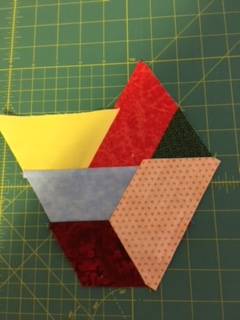
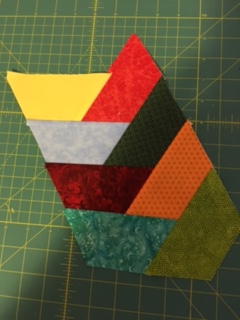
Continue adding pieces to desired length allowing enough length to square off top and bottom leaving ¼” seam allowance on each end.
Internet Resources for Quilters
Comfort Quilts: Beach Balls Kits
Ladies,
Thank you so much for helping with the charity kits that we call “Beach Balls” for short. Use the link to Pellon’s Divide & Conquer free tutorial for help piecing the kits, but……… We have added a little extra.
On the 4 1/2″ corner squares we have drawn two stitching lines. (This is where we get the triangles for the pinwheel quilts ) ******* you must place the shorter line towards the corner that will be trimmed off. Stitch on the drawn lines with 2.0mm or 2.5mm stitch length.


— Betty Ann
Back Baste Appliqué – 6:00 demo Aug 2015
I substituted for Linda Cronise. I do lots of hand appliqué, but I hadn’t done this particular method before the demo. I found a tutorial on-line to guide me.
More notes on my experiences:
- I use 50 weight silk thread matching the applique piece.
- Size 10 Straw Needles from Foxglove Cottage are my favorite.
- Clover needle threader
- DON’T clip any outside curves; just sweep the seam allowance under with your needle for 1 or 2 stitches at a time. You’ll get lovely smooth curves.
- Clip inside curves almost to the turn line. When sweeping under, pull it fairly tight to make it a smooth curve past the clip point.
- Points: this video is very similar to the way I do my corners. Except — she omits my cheat of an “eyelash” stitch straight out from the end of the point to fool the eye about the point sharpness. The video shows inside corners as well.
We had an appliqué demo in 2011 as well. Use that as another perspective on the process.
— Susan Kraterfield
